How to cope with lower back and hip pain on one side?

One-sided love sure hurts but lower back and hip pain on one side hurt even more! Lower back pain can be extremely, and there are different reasons for it. You might be dealing with arthritis, bursitis cramping your style, or it might be the effects of sitting at a desk all day. Precisely, lower back and hip pain on one side is no fun at all.

10 Ways to relieve lower back and hip pain on the side

Stretching

Stretching is never a bad idea for lower back and hip pain on one side. You can run through as many of these stretches as you can at one time, lasting at least 30 seconds ideally for 1 to 2 minutes and on each before moving on to the next.

Hip flexor stretch

For this stretch, you need to get into a lunge on the ground.Proceed further put your left knee on the floor, your right leg should bend out in front of you at a 90-degree angle, while your right foot flat on the ground.

Keeping your hands on your hips, move your pelvis and torso forward slightly until you feel a stretch in your left hip flexor. Take breaks where you feel tense and hold, or you can go further into the stretch as you become looser.

Butterfly stretch

To lessen the lower back and hip pain on one side you have to sit on the ground, bend your legs, and try to bring the soles of your feet together so they touch, and then letting your knees fall out to the sides.

You can bring your heels as close to your body as you can to lean forward into the stretch; now using your elbows try to gently push your knees toward the ground.

Pigeon pose

You might have guessed it by its name you have to start on all fours, now gently bring your right knee forward, and gradually place it behind your right wrist with your ankle near your left hip.

It depends if your hip is tight, then allows your outer right glute to touch the floor rather than rest on your left hip. Keep breathing, and allow yourself to sink deeper into the stretch.

Figure four stretch

To fix a lower back and hip pain on one side you need to lie on your back with your legs bent and feet flat on the ground. Now softly place your right ankle on your left knee, loop through your hands around the back of your left leg, and slowly draw it toward your chest. You can feel this stretch in your glute and hip.

Yoga squat

For yoga squat for lower back pain you need to stand with your feet shoulder-width apart, then carefully bend your knees and drop your butt directly down to the ground. Now allow your arms in front of you in a prayer position. Keep breathing through the movement; now slowly allow your elbows to gently press your thighs further apart.

Leg swings

Leg swings are a great choice for lower back and hip pain on one side. Complete this dynamic move both fronts to back and side to side to open up your pain on the left side of the back above the hip.

To perform leg swing, you need to choose a stable surface, step back about a foot, and begin to swing your leg like a pendulum from side to side. Try to minimize twisting your torso.

Gradually, turn your side to the wall, and confine yourself to begin to swing your leg back and forth, slowly allowing a stretch in your hip flexors, hamstrings, and glutes.

Ways to strengthen the lower back

Before thinking to cure the disease you would like to adopt a lifestyle to assist it to eradicate it. It always comes right down to strengthening your body to cure lower back and hip pain on one side. You’ll be able to form three or 4 of those exercises for one workout; you’ll be able to also complete 3 sets of 10 to 12 reps each. You’ll also mix and match from session to session to avoid losing interest in 1 routine workout regime.

Lateral squat

Starting along with your feet double shoulder-width apart, keep your toes slightly out. Shift your weight to your right leg and push your hips back as if you’re visiting sit during a chair.

Try to keep as low as you’ll go while keeping your left leg straight. make sure that your chest stays up and your weight is on your right heel. Then, repeat the identical steps on the opposite leg. This is often one rep.

Fire hydrant

For lower back and hip pain on one side, gradually start on cards together with your hands directly below your shoulders and knees directly below your hips.

Keeping your left leg bent, raise it directly bent on the side until your thigh is parallel to the ground. Hydrant will help lessen lower back pain and swelling in legs and feet too.

Make sure your neck and back are straight and your core stays engaged throughout this move. Slowly keep lower back off. Repeat on another side.

Banded walk

Grab an exercise band and acquire to steppin’! Place it around your ankles or simply above your knees, bend your knees slightly, and side shuffle, feeling your hips working with each step.

Make sure to stay your feet pointing straight ahead while sidestepping. After 10 to 12 steps in one direction, stop and go the opposite way.

Single-leg Glute Bridge

This is a more advanced move. Popping one leg up during a bridge will get up your glutes and permit you to feel a stretch in your stationary hip.

Lay on your back together with your knees bent and feet on the ground as you’d with a daily glute bridge. Extend your right leg before you push yourself off the bottom, using your core and glutes to try and do so.

It’s much easier to deal with lower back and hip pain on one side than you can imagine. All you need to follow a healthy lifestyle with a strict workout regime.

Why Every Gym Needs an Acupressure Bed

Whether you’re a corporate big-box gym, a local performance center, or a CrossFit gym, you need to consider investing in an Acupressure Bed. While you likely aren’t familiar with this piece of equipment just yet, you soon will be!

If you’re eager to find out more about the uniqueness and effectiveness of the Acupressure Bed, continue reading because the following will be a detail on why YOU as a fitness facility need one.

What is a 3H Acupressure Bed?

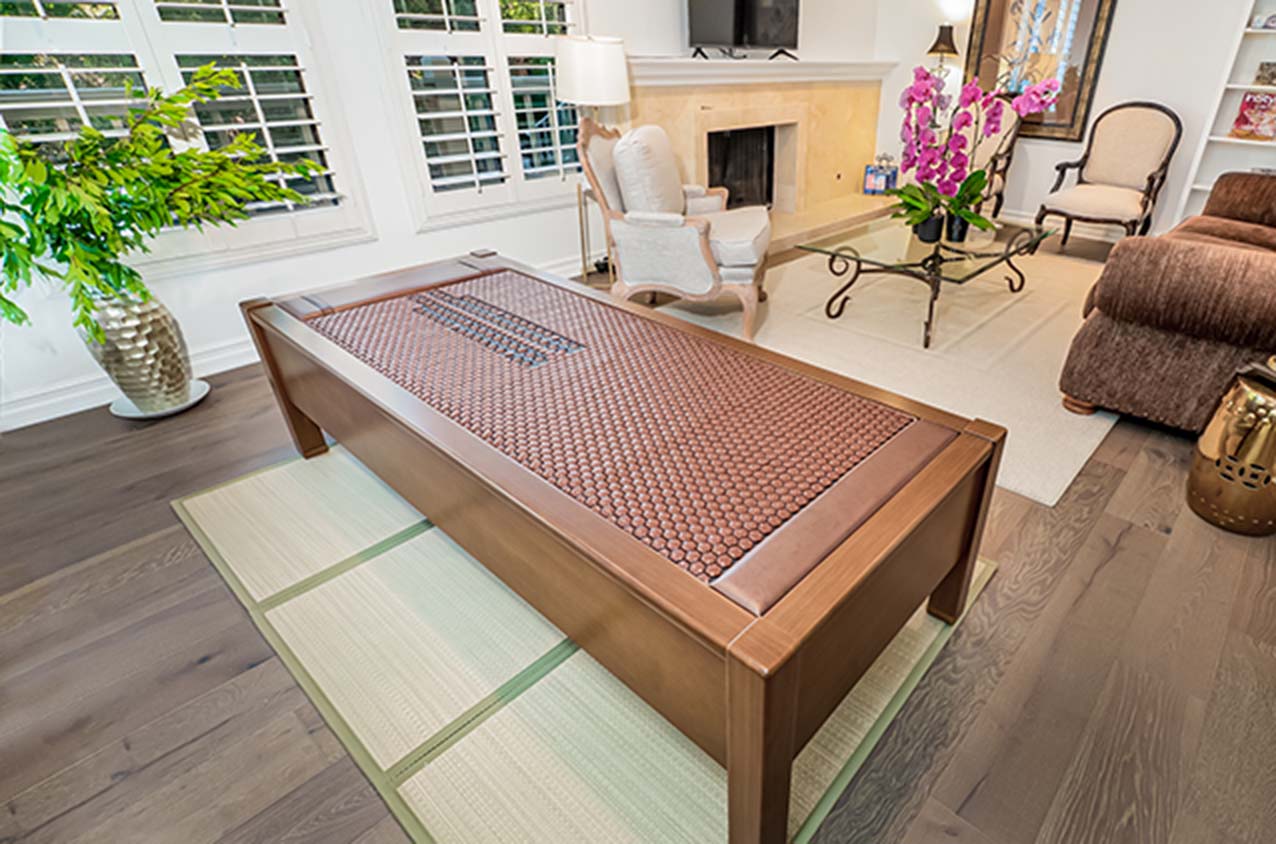
Unlike any other piece of fitness or therapeutic equipment on the market today, the 3H Acupressure Bed is a premium massage table that aids in the relief of chronic pain, and fatigue, while also promoting injury prevention and healing.

Through the use of infrared rays similar to what you’d experience in an infrared sauna, combined with the functionality of acupressure and heat, this Acupressure Bed is the ultimate tool for recovery and repair; something every athlete could use more of!

The best part? It provides a full-body massage while specifically targeting the spine; something that a standard massage gun, for example, can’t do. In addition, unlike massage guns that require effort and strain on the user’s behalf, the 3H Acupressure Bed does the work for you, with little to no effort needed on your part.

Just one of the many reasons why every gym needs an Acupressure Bed!

Why Gym Owners Need to Invest in an Acupressure Bed

There are several reasons why gyms need to consider the utility of an acupressure bed, the first being quite evident; it’s the one piece of equipment that every single gym member can benefit from.

Whether as a warm-up before you exercise to prime the body for action OR after an intense workout to aid in recovery, the Acupressure Bed can help. Suitable for all populations and circumstances, it’s a great way to stand out amongst the competition.

Withstanding its obvious health and wellness benefits, the acupressure bed can also benefit gyms from a business point of view. How? By increasing the facility’s marketability.

Not only is it a certified medical device, a label enough to attract a whole host of untapped clientele, but its level of innovation and uniqueness will attract customers like you never thought imaginable.

A Final Word


So, if you’re a gym owner looking for new and innovative ways to increase the marketability of your facility, ultimately increasing the number of memberships sold, what better way than to offer a highly beneficial, highly innovative piece of equipment sure to get the excitement buzzing?!

The 3H Acupressure Bed maximizes recovery, increases healing speed, and improves overall well-being; all incredibly necessary attributes that any gym member can benefit from.

Looking to get started with a 3H Acupressure Bed today? Be sure to contact us to request a rental and try this new way of healing! You won’t regret it and your members will surely thank you for it.

3H Acupressure Bed: How to use it, what it does, and why you need one

Since its founding in 2014, 3H has taken huge steps in revolutionizing the health and wellness industry. Through its crowning innovation, the 3H acupressure bed, and several other patents and inventions, 3H is making the world a better and healthier place. Want to know what the 3H acupressure bed is and why you need one? Keep reading below!

What is the 3H acupressure bed and why do I need it?

The 3H acupressure bed is a state-of-the-art massage bed that combines acupressure and far- infrared rays in order to heal the body from chronic pain, injury, muscle ache, and fatigue. A remote control allows for customization of the massage options, and lets you change the temperature of the bed from 104°F- 158°F. This makes the perfect combination of temperature, far-infrared rays, and moxibustion, a type of eastern heat therapy. This groundbreaking fusion of
eastern medicine and modern innovation provides relaxation and healing like nothing else. This is ideal for anyone who exercises regularly, suffers from chronic joint pain, or even just wants to feel better in their body.

How does the 3H acupressure bed work?

The 3H acupressure massage bed focuses individually on each section of the body, with a designated rod for each of the 62 acupressure points in the human spine. When targeted through the remote control, ceramic rods come up to massage these important pressure points. All the ceramics of the acupressure bed are made from 3H’s patented MK303 material, a bio ceramic that has been proven to combat disease and bacteria. MK303 emits far-infrared rays, or
FIR, a type of electromagnetic radiation with many healing properties. Acupressure points are “pressure points” that generally lie through the center of your body on your spine. Each point is connected to a different part of your body, and when massaged can provide healing and release tension to that specific area. Acupressure has been used in eastern healing techniques for thousands of years.

When should I use my 3H acupressure bed?

Each session on the acupressure bed lasts for 40 minutes, but it can be used for longer or multiple times throughout the day to get even more benefit. It can be a great warmup before physical activity or a relaxing post-activity recovery massage. Additionally, the other massage options allow you to individually target the Cervical, Thoracic, and Lumbar and Sacral regions of the spine for a custom massage wherever you need it. Use your acupressure bed twice a day for the maximum benefit in overall well-being.

What makes the 3H acupressure bed better than other massage beds?

The primary things that make the 3H acupressure bed stand out are the special patented ceramics made with MK303, and the emitting of Far-Infrared Rays. Far infrared rays are proven to help boost better blood circulation and a strong Immunity system. Acupressure is a natural healing method that can soothe and relax your body without increasing harmful toxins or harsh medicine. The entire acupressure bed is relaxing and enjoyable so you can sleep while the
machine eases tension in your muscles and promotes overall health. To maximize your well-being and increase your healing speed after serious physical activity, get started with a 3H acupressure bed today. Contact us to arrange to request a rental modal and try this innovative new healing method today!